Video Transcript
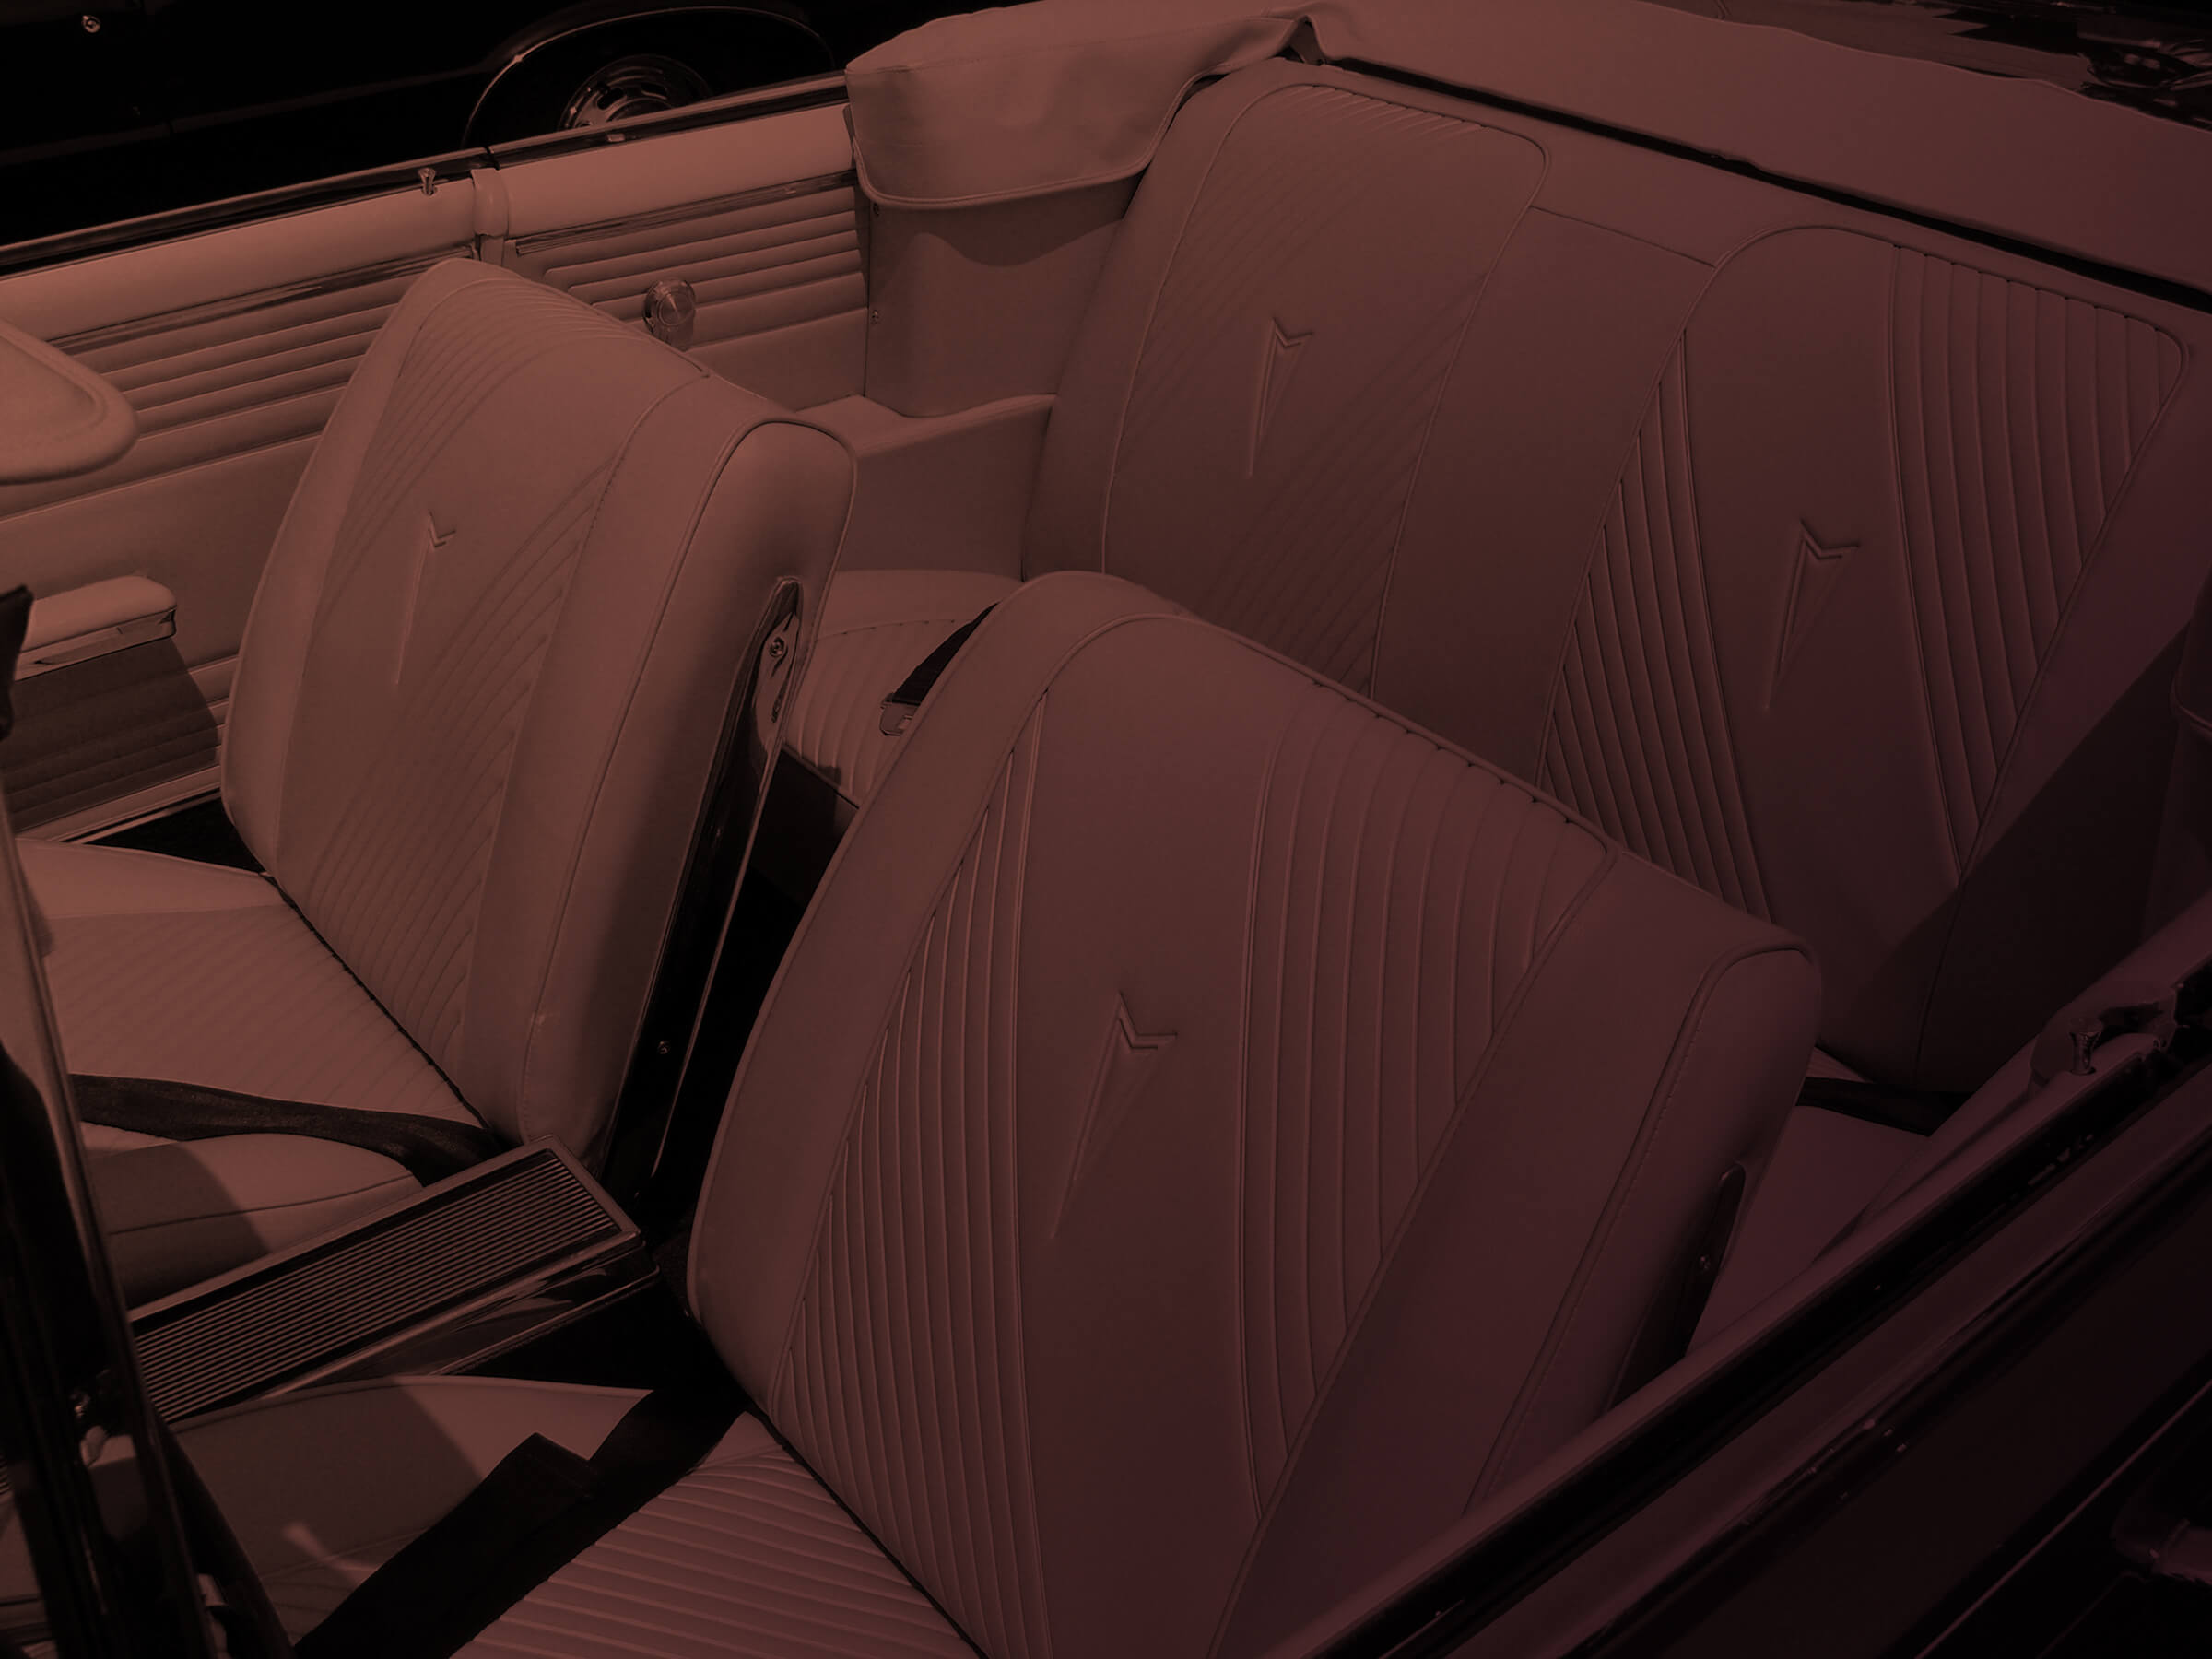
Hi, I’m Ron Halbritter, technical advisor for Legendary Auto Interiors, and I’d like to welcome you to Legendary Studio where today we’re going to show you the proper way to install our seat covers for our 1970 Chevelle.
Now, that’s going to include preparing our seat frame for all these new items in our installation kit, including our burlap, our paper coated listing wire, our two inch felt, our molded foam kit, and our cotton. Now together with Randy Brown and the help of Legendary Auto Interiors, we’re going to show you why Legendary Auto Interiors is number one with collectors, restorers, and enthusiasts worldwide.
Our first step will be to take a layer of burlap and cover the seat springs. This will prevent the seat cushion or the molded foam from working its way down in between the seat springs. You want to pull some tension on the burlap and trim out an area in the hinge area so nothing binds when the front seat top is assembled to the front seat bottom.
Spread the hog rings about every two to three inches apart and keep some tension on the burlap so it’s nice and tight. You want to trim off any excess. Continue all the way around the outside perimeter, taking your hog rings and clamping around the burlap and around the seat
spring perimeter. You’ll then want to take the two-inch felt that’s supplied in our installation kit and hog ring it around the outside perimeter of the front seat bottom. This will help in padding the front seat bottom so the seat springs don’t prematurely wear through the molded foam or sheet cover.
You will want to repeat the process on the front seat top. The only difference is the front seat top does not get any two-inch felt around the outside perimeter. We normally start with the bottom then do the top edge and then come down along the sides and do the outside perimeter.
Our next step we need to cut down through the channels in our molded foam and we need to set the molded foam up on top of our seat springs. Take a black sharpie and draw a black line on top of our burlap. This is where we’ll need to attach the paper coated listing wire. What this paper coated listing wire does is when the pocket is in the seat cover tucked down through the molded foam it attaches to this specific area and gives it that three-dimensional look.
You’ll see Randy’s putting a 90-degree bend on the front edge and the back edge which will prevent that paper coated listing wire from traveling front to back. You’ll want to tuck it up underneath that 2-inch felt so it doesn’t prematurely wear through your seat cover.
You’ll want to repeat the process on the opposite side. Again, tuck it up underneath the two-inch felt and hog ring it securely.
The General Motors seats on top of the burlap have a layer of cotton where we attach those paper cords listing wires. You’ll want to separate the cotton and peek down through there so you can see it because we’ll need to get down through there when we attach our seat cover. Then we set our molded foam kit on top of that cotton. What the cotton does is actually helps fill that seat cover out so when you install it there’s no wrinkles and it fits securely.
We want to start by attaching the molded foam kit along the back edge in between the seat rails. Once that’s secured, we can flip the seat over then roll the muslin over the edge of the seat springs and the cotton and hog ring it to the base of the seat springs. This will keep our molded foam kits secure while we’re installing our seat cover. You want to do the front edge and the
side edges, and you want to peek down through the slits that we made in our molded foam and make sure that you can see that paper coated listing wire.
Moving on to our front seat top, we want to repeat the entire process that we did in our front seat bottom. We want to set our molded foam kit on top of our seat springs, draw our lines where we cut down through our molded foam, attach our paper coated listing wire along those lines that we just drew on top of our burlap, making sure that we put those 90-degree bends on the ends so it doesn’t travel top to bottom, exactly like we did on our front seat bottom.
You want to space the hog rings out on that paper coated listing wire about every three to four inches apart. You want to repeat the process on the opposite side, making sure that the 90-degree bends are on the ends so that paper coated listing wire does not travel top to bottom.
Our next step, as we did on our front seat bottom, is to put a layer of cotton over the top of our burlap. You want to trim off about three to four inches larger than the perimeter of the seat springs. Carefully just wrap the edges around and feel down through the cotton where that paper coated listing wire and separate it. You don’t have to cut the cotton, it actually pulls apart easier than it does cutting it. You want to separate both sides so you can actually see down through and look at the paper coated listing wire through the cotton.
Now we want to install our molded foam kit over the top of our cotton. We want to secure the top area just below the headrest area. You want to tuck it underneath the brackets for the back panel, because when that back panel slides on it slides on over the top of those flat pins located just on the lower headrest area. We then want to attach the bottom area and then move along to our sides. You want to wrap the muslin over the edge of the seat springs and the cotton and attach it to the lower portion of the seat springs.
You want to repeat the process on the opposite side, and then overlap the corners in the hinge area. You want to tuck that up underneath the hinge so the hinge functions properly when you assemble the seats.
Our next step will be to start assembling your seat covers. We want to slide the paper coated listing wire into the pockets that are sewn into the seat cover. We then want to position the seat
cover on top of our molded foam, making sure that the cover is positioned symmetrically. We want to tuck those pockets that are sewn into the seat cover that have the paper coated listing wire, and you want to tuck it down through the molded foam past the cotton and attach it to the paper coated listing wire that’s attached to the top side of our burlap just above our seat springs. Now you want to hog ring through the paper coated listing wire in the seat cover and then down through and around the paper coated listing wire attached to the seat springs.
Once both sides are done, you want to attach the paper coated listing wire along the front pocket and the side pockets before you wrap that perimeter over. It will be a lot easier to do it when the covers at this stage as opposed to wrapping the cover first and then trying to put the paper coated listing wire. You want to carefully bend that wire because it’s pretty rigid so it takes the shape of that corner. You want to repeat the process on the opposite side. Tuck the paper coated listing wire in through the pocket that’s sewn into the seat cover.
Now you’ll see Randy us tucking the paper coated listing wire into the last pocket on the back
side of our rear stretch panel. This is where we’ll tuck down in the backside of the seat. Our next step will be to wrap the front perimeter around the edge of the molded foam. You want to compress the foam and pull the seat cover down over the top and around the perimeter edge of your molded foam and your cotton. You can carefully work out any wrinkles that you may have.
You don’t attach any hog rings until you repeat the process. You want to collapse the foam, come back over and wrap the vinyl over the edge of the foam. If you start attaching the hog
rings, your seat cover probably will not travel that well and may have a tendency to rip, so we like to wrap all of our perimeter edges before we start attaching our hog rings.
We want to start attaching in between the seat rails on the front edge, that way your alignment will be correct. Make a couple of anchor points on the front corners. You can flip the seat over on its front side, but you’ll be able to tell just when you’re hog ringing around the paper coated listing wire what your seat cover is going to look like. You can periodically take a look at the front side and flip it back over on its face to continue working on it.
You want to repeat the process on the opposite side before we start attaching our back edge. You can collapse the springs and the vinyl while you’re attaching your hog rings. It’ll make it a lot easier and a lot less stress put on the listing pocket and the listing wire while your hog ringing.
Once your front and your side edges are attached, we’re going to move along to our back edge. You’ll see along the outside edges there’s a two to two-and-a-half inch piece of listing that needs to attach to our seat frame. This is a very important step in our front to back alignment. once those are attached you come down through and in between the seat rails in the back edge of the seat, hog ring around the paper coated listing wire and to the seat springs.
We then want to tuck our stretch panel board behind the stretch panel. Wrap the edge of the vinyl over the top of that board and hog ring that listing edge to the bottom side of the seat springs. This will provide some extra support. That way if anybody is sitting in the back seat and their feet wind up kicking that area, it doesn’t damage your seat cover.
After that is attached you want to move along to the outside perimeter edge of the rail skirts. The rail skirts you want to pull into place and wrap over the edge just so it has a nice cosmetic look. What this area does is hide the seat rails when the seat cover is all installed. Now you want to come over to your front side and you can work any minor wrinkles out or you can steam your seat cover at that point.
Now that our bottom is complete, we can move on to our front seat top. We want to position the
cover, turn it inside out, then position it on the molded foam and make sure it’s symmetrical top to bottom and side to side. Our first step will be to take the listing pockets that are sewn into the seat cover and tuck them down through the molded foam and through the cotton and attach the hog ring around the paper coated listing wire and then all the way down through the molded foam and attach it to the paper coated listing wire that we attached to the top side of the burlap.
You want to repeat the process on both sides. After it’s complete you want to make sure that your seat covers are installed symmetrically. This is a very important step before you wrap the edges of vinyl over the edges of your molded foam.
We want to start wrapping the top edges over. We don’t want to attach any hog rings yet. We want to get the cover over the edge of the molded foam and sometimes you’ll need that vinyl to travel so we need to get that vinyl over the edge first. You can compress the foam and then
pull the seat cover over the edge of the foam and then compress the foam while you’re working the edge of the seat cover over the top of the molded foam.
You can kind of tell how your seat cover is going to look even at this step. You can work some wrinkles out, you could pull the vinyl down towards the bottom edge of the seat to help remove any of the wrinkles you have.
We want to flip the seat cover over onto its face and start in the back lower headrest area. Tuck the seat cover underneath the back panel hooks and then attach it to the seat frame in its factory location.
After the lower headrest area is complete you want to move down to the lower edges on the corners. You want to make sure that your hinge moves freely and the seat cover is tucked up underneath that hinge area. There’s a small flap that goes up underneath that hinge area that we want to attach first.
After the lower hinge area flap is attached we want to come over on the outside edge of the seat. The piping should run right along the very bottom edge of the seat frame. You can come up towards the top edge and make sure there’s no puckers in the corner area and then fill in some areas along the side with some hog rings. In the corners you may have to overlap so there’s no buckles so when our back panel goes on you don’t see any wrinkles.
Then we want to repeat the process on the opposite side. We come over to our front side we can work any wrinkled areas out, working the vinyl down towards the bottom edge of the seat.
It’s a good idea to steam your seat cover if you have steamer capabilities right before we finish installing our lower stretch panel.
This brings us to the latter part of our seat cover installation. We installed the lower rear
stretch panel and you’ll see there’s a listing pocket that the paper coated listing wire slides over the top of and wraps around the edge of the molded foam and then hog rings right to the seat. You want to make sure that it goes up underneath the strap that connects the top and bottom as far as the tilt button. You want to make sure the seat cover is up underneath that.
You can periodically flip the seat cover back over on its front side to make sure it’s going to be wrinkle free, and now our front seat top is ready to attach to our front seat bottom.
The first step in attaching our front seat top to our front seat bottom is attaching the seat bumpers. This protects the seat cover while the front seat top is in its up position and it rests against the backrest. We want to use a hole aligner or you can leave the screws in it while you put your seat cover on, that way it’s a little easier to find through the vinyl. It’s usually held down by a Philips screw and there’s one on each side.
Our next step is to attach our front seat top to our front seat bottom. In the hinge area you’ll notice there’s a small bracket underneath the seat rail. This odd-shaped bracket holds the plastic seat cover trim. It’s a decorative trim piece that goes on the outside of the seat after your seat cover is all complete.
The bolts that bolt the front seat top to the front seat bottom go through the hinge area, through the small decorative support bracket, and into the front seat bottom. After the bolts are in place, we can take the vinyl and hog ring the side skirt on the front seat bottom with the rear stretch panel. There’s a plastic decorative piece that goes over the top of this so it will hide your hog rings and it will not be visible.
Hopefully this video has been very helpful for you. Keep in mind you can use this video as a guideline for installing any 1966 through 1972 GM A body seat.